I thought it would be helpful if I provided a general overview of the conversion process that I undertook when designing and building our first ProMaster Camper Van prototype vehicle.
It’s easy to spend an endless amount of time pre-planning your build, what items and conveniences you deem are necessary for your own personal needs.
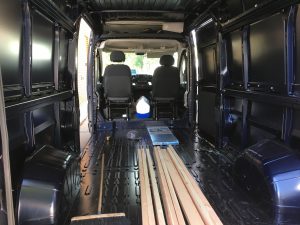
ProMaster Cargo Van Rear Storage Area filled with 2x4s – A new project ready to get started.
For me, the reason I started this project was to achieve a higher degree of freedom. Although there are plenty of trade-offs, the ability to park your house every night allows you to have a more variability in your life. Want to go to Arizona for the week? Florida? Minnesota? You’ve got a place to stay.
That’s all to say that this was a ticking time bomb: A van in the driveway with no real plan on how the build was going to go. Dive into the problem. Sitting inside an empty van is a great place to get inspired.
Step By Step Overview
- Sound Deadening, Insulation, Subfloor & Underlayment
- Bed Platform & Inset Bed Walls
- Ceiling Fan / Window Installation
- Furring Strips for Ceiling & Walls
- Power & Electrical Systems
- Kitchen Systems
- Storage & Cabinetry
- Paneling Installation
- Laminate Flooring Installation
- Moulding, Upholstery & Cabinet Doors
I’ll fill these posts in with links as they become available.
Thanks for reading!

PBJ’s in the van: Very convenient!
Howdy!
I’m interested in converting a commercial van into a living space like you have. After reading your second post I was so sad there wasn’t a third. More please! 🙂
Cahlen